Huf Generation 2 RDV Valve Installation Instructions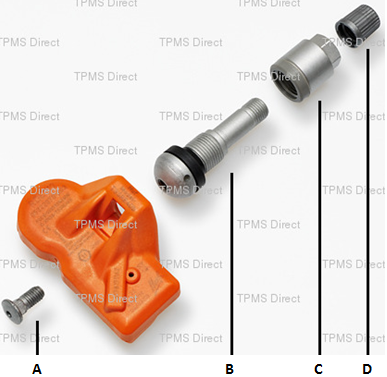
Instructions intended for Huf generation 2 valve stem assembly:
1. Before inserting the valve, please ensure that the valve hole and the surface of the rim are cleaned and even to allow for proper sealing. 2. Insert screw into the slotted hole of the sensor making sure that the flats of the square fit inside the edges of the holes. 3. While holding the screw in the hole, tighten the screw into the sensor 3 or 4 full revolutions making sure not to over tighten the valve. You should be able to have free travel the full length of the slot. 4. Insert the loosely assembled valve stem into the hole of the rim. 5. Tighten the nut with washer two turns to get it hand tight. 6. While holding the sensor against the drop center of the rim and grommet against the sealing surface torque the nut until the shear washer tears free. 7. After the shear washer tears free you will tighten several more revolutions until you reach 4Nm ± 0.5Nm. 8. Tighten the valve cap to complete the process. 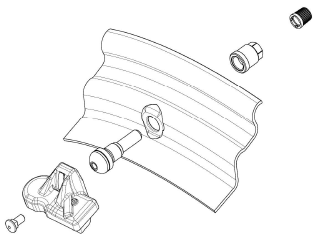 |