Tire Mounting Guidelines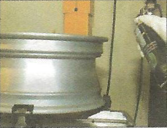 1) Place the rim on the mounting table with the curb side of the rim face-up and secure the rim clamps. Next, move the sensor to the 5 o'clock position. See photo in step 4 to verify sensor position. 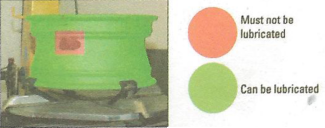 2) Apply lubricant to the bead area of rim, but do not apply any lubricant to the sensor and its surrounding area. Then apply lubricant to the tire bead areas. 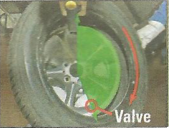 3) Place the tire on the rim, making sure that directional tires are mounted in the appropriate direction. 4) Then, place the tire mounting head securely to rim at the 12 o'clock position and slide the inner tire bead partly over the lip of the rim. 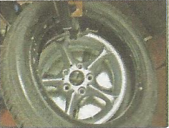 5) Using a tire tool, lift the inner tire bead up and place it partly on the mounting head. Then, while rotating the table, manually assist the tire until the lower bead is completely positioned.  6) Now, rotate the mounting table so that the sensor is once again in the 5 o'clock position. Using the tire tool, lift the outer tire bead partly on the mounting head and while rotating the table, manually assist the tire until the outer tire bead is positioned.  7) To inflate the tire, first remove the valve cap and core. Keep these in a safe, easy to find place. Next, inflate the tire up to a maximum of 40-50 psi or 3.5 bar to seat the tire beads. Two popping sounds indicate that both tire beads have been seated. Re-install the original valve core, if clean, then adjust the tire pressure to the vehicle's recommended placard pressure, and re-install and tighten the valve cap. The tire is now ready to be mounted on the vehicle. |